# Tableに画像を表示
Dashcombが提供している[Table](https://github.com/dashcomb/gitbook-doc/blob/master/ide/ui-component-table.md)コンポーネントは画像URLを解析し、指定されたサイズや位置で画像を表示することが可能です。
## 準備
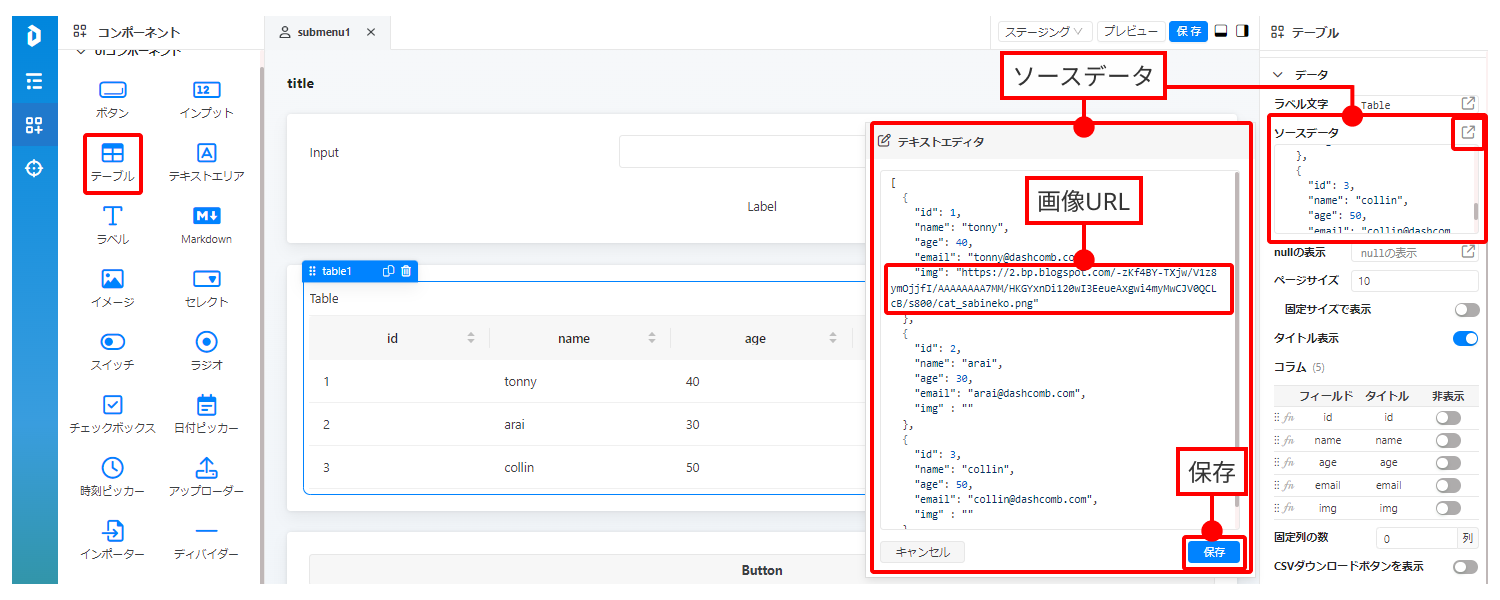
* これから使うデータソースに画像URLのコラムを入れておきます。
* データソースに格納しているのは画像ファイルではなく、画像URLの文字列です。
* データソースのデータをTableコンポーネントに表示させてます。(画像URLの初期表示は文字列です)
* 詳細は[Table](../ide/ui-component/table)にご参考ください。
## 実現
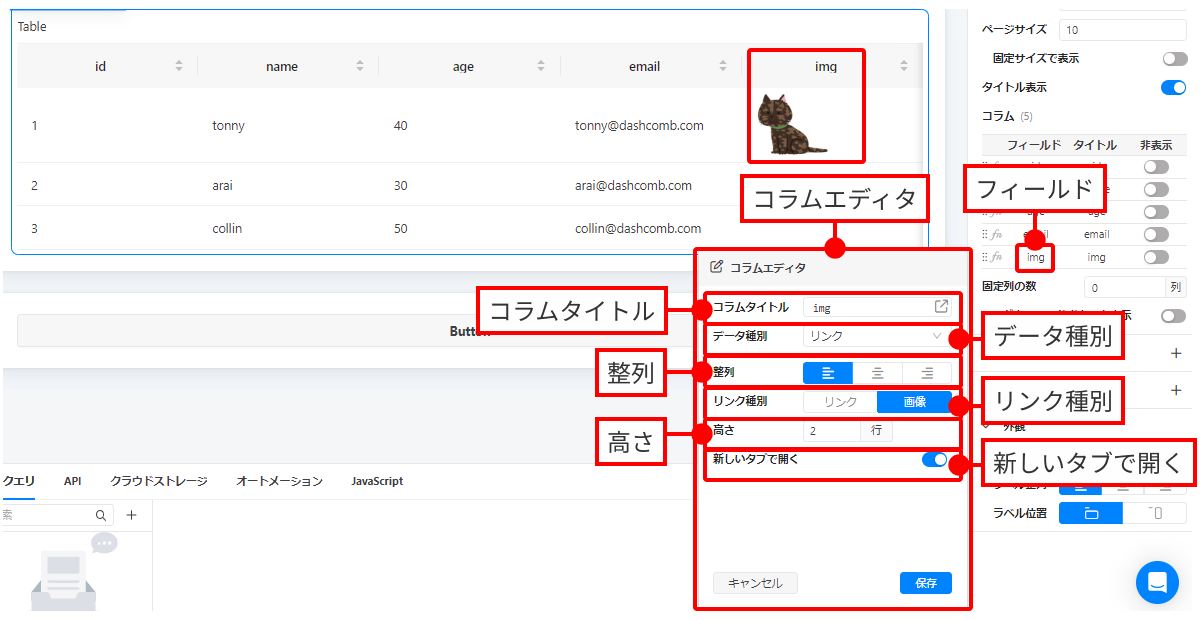 * 表示先の[Table](../ide/ui-component/table)コンポーネントをクリックして、右側の\[プロパティ領域]に(../ide/region/property-region.md)「コラム」項目を表示させます。
* 表示元の画像フィールドをクリックすると、[コラムエディタ](../ide/property-region/column-editor)が開かれます。
* 「データ種別」項目から「リンク」を選びます。
* 「リンク種別」項目から「画像」を選びます。
* 画像の「高さ」や「整列」などを設定します。
* 「新しいタブで開く」かどうかを設定します。
* 「保存」ボタンをクリックすると、[Table](../ide/ui-component/table)にある画像のURLは画像に変身します。
## 参照項目
* [コラムエディタ](../ide/property-region/column-editor)
* [Tableの使い方](../ide/ui-component/table)
* 表示先の[Table](../ide/ui-component/table)コンポーネントをクリックして、右側の\[プロパティ領域]に(../ide/region/property-region.md)「コラム」項目を表示させます。
* 表示元の画像フィールドをクリックすると、[コラムエディタ](../ide/property-region/column-editor)が開かれます。
* 「データ種別」項目から「リンク」を選びます。
* 「リンク種別」項目から「画像」を選びます。
* 画像の「高さ」や「整列」などを設定します。
* 「新しいタブで開く」かどうかを設定します。
* 「保存」ボタンをクリックすると、[Table](../ide/ui-component/table)にある画像のURLは画像に変身します。
## 参照項目
* [コラムエディタ](../ide/property-region/column-editor)
* [Tableの使い方](../ide/ui-component/table)